Introduction
Modern browsers and ad blockers are increasingly limiting the effectiveness of the traditional Meta Pixel, resulting in incomplete conversion tracking.
The solution is the Meta Pixel Conversion API Setup with GTM & Stape — a hybrid of browser and server-side tracking that ensures accuracy and deduplication.
This step-by-step guide focuses on tracking a Lead Event (form submission) using Google Tag Manager (GTM) and Stape.io for Meta CAPI implementation.
Prerequisites
Before setup, make sure you have:
- Stape.io account (Server-Side environment ready)
- Google Tag Manager (Web + Server containers)
- Meta Pixel ID, CAPI Token, and Test ID from Event Manager
- Listener Code for capturing form submissions
- GA4 Client active in your Server Container
 Need Help?
 Hire Me for Setup: WhatsApp Me
Book a Consultation: Schedule a Call
Step 1: GTM Web Container Configuration (Browser Side)
Your GTM Web Container manages browser tracking and sends identifiers to the Server container.
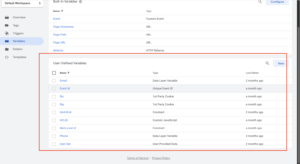
A. Create Required Variables
- Constant Variable: Meta Pixel ID (store your Pixel ID)
- Unique Event ID: From Template Gallery (used for deduplication)
- First-Party Cookies:
- FBP → Cookie name _fbp (Browser ID)
- ABC → Cookie name _fbc (Click ID)
- FBP → Cookie name _fbp (Browser ID)
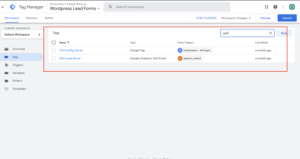
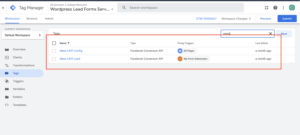
B. Configure Meta Pixel Tags
Use the Facebook Pixel Template (by Meta):
MetaPixel Config (PageView):
- Event Type: PageView
- Trigger: All Pages
- Add Variables: Event ID, FBP, ABC
MetaPixel Lead:
- Event Type: Lead
- Trigger: Custom Event (Form Submission)
- Add Variables: Event ID, FBP, ABC
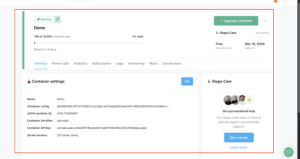
![]()
C. Send Deduplication parameter to Server
Edit your GA4 Client Tag to include key identifiers:
- Add Event ID, FBP, and ABC parameters to both PageView and Lead events.
Step 2: GTM Server Container Configuration (Server-Side Tracking)
The Server GTM Container handles your Meta Conversion API setup and sends deduplicated data to Meta.
A. Create Server Variables
- Event Data Variables:
- FBP → Key Path: fbp
- ABC → Key Path: fbc
- Event ID → Key Path: event_id
- FBP → Key Path: fbp
- Constant Variables:
- Meta Pixel ID
- Meta Token (CAPI Access Token)
- Meta Test ID
- Meta Pixel ID
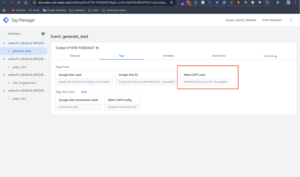
B. Configure Conversion API Tags
Use Facebook Conversion API Tag (by Stape.io):
Meta CAPI Config (PageView):
- Event Type: PageView
- Trigger: All Pages
- Variables: Pixel ID, Token, Test ID, Event ID, FBP, ABC
Meta CAPI Lead:
- Event Type: Lead
- Trigger: Custom Event (Lead)
- Use same variables and credentials.
Step 3: Testing & Deduplication Verification
Testing ensures both Pixel and CAPI events are firing correctly.
1️⃣ Start Preview Mode in both Web and Server GTM containers.
2️⃣ Open Meta Event Manager → Test Events tab.
3️⃣ Test PageView:
- Load your website.
- Confirm both Browser & Server events appear.
- Check Event IDs → must match.
4️⃣ Test Lead Event:
- Submit your form.
- Ensure Event IDs for both sources match perfectly.
Frequently asked questions
1️⃣ What is Meta CAPI?
It’s Meta’s server-side solution for sending conversion data directly to Meta, improving tracking reliability.
2️⃣ Why use Stape.io?
It simplifies Meta Pixel server-side tracking with automatic GTM Server hosting.
3️⃣ Why combine Pixel + CAPI?
It prevents duplicate tracking by using one unique Event ID.
4️⃣ Can I track other events?
Yes — replicate this setup for Purchase or AddToCart events.
5️⃣ How do I test my setup?
Use Meta Event Manager → Test Events tab and confirm matching Event IDs for Browser and Server events.
Conclusion
By completing this setup, you’ve implemented a Meta Pixel Conversion API Setup with GTM & Stape that ensures:
✅ Accurate Lead tracking
✅ Reliable event deduplication
✅ Strong data privacy compliance
✅ Full server-side tracking performance
🚀 Need help setting up Meta Pixel Conversion API via GTM & Stape for lead tracking?
Hire Me for Setup: WhatsApp Me
Book a Consultation: Schedule a Call
